
Egg Dough
The Basic Egg Dough and Large-Batch Egg Dough have the same method but yield different amounts. Don’t worry, I’ll tell you when to use each. As I created the recipes, I sometimes found that the large-batch formula yielded too much pasta for four people. (I know that many are scoffing at me right now—can there be such a thing?) But, when pasta is served with a hearty sauce, veg-heavy topping, or protein, I have found that having a bit less dough is better.
Yield
Basic Egg Dough
Makes 4 servings (about 1 pound dough)
Large-Batch Egg Dough
Makes 4 to 6 servings (about 11⁄2 pounds dough)
Tips
- Clear the decks, you’ll need space!
- If you’re in a pinch and can’t get tipo 00 flour, you can use all-purpose flour with a 9 to 11 percent protein; it just won’t be as luxurious.
- If making dough by hand and the eggs leak from the flour well, grab a bench scraper and scoop them back into the center of the well pronto, then try to repair the broken wall. (Think of this as a rite of passage.)
- If you leave the ball of dough out for quite a long time (or overnight in the fridge, as I do sometimes), it will oxidize; but don’t worry, it will return to its former color as you roll it out.
- Once you’ve cut or shaped your pasta, it can be cooked immediately, but it’s perfectly okay if it dries out.
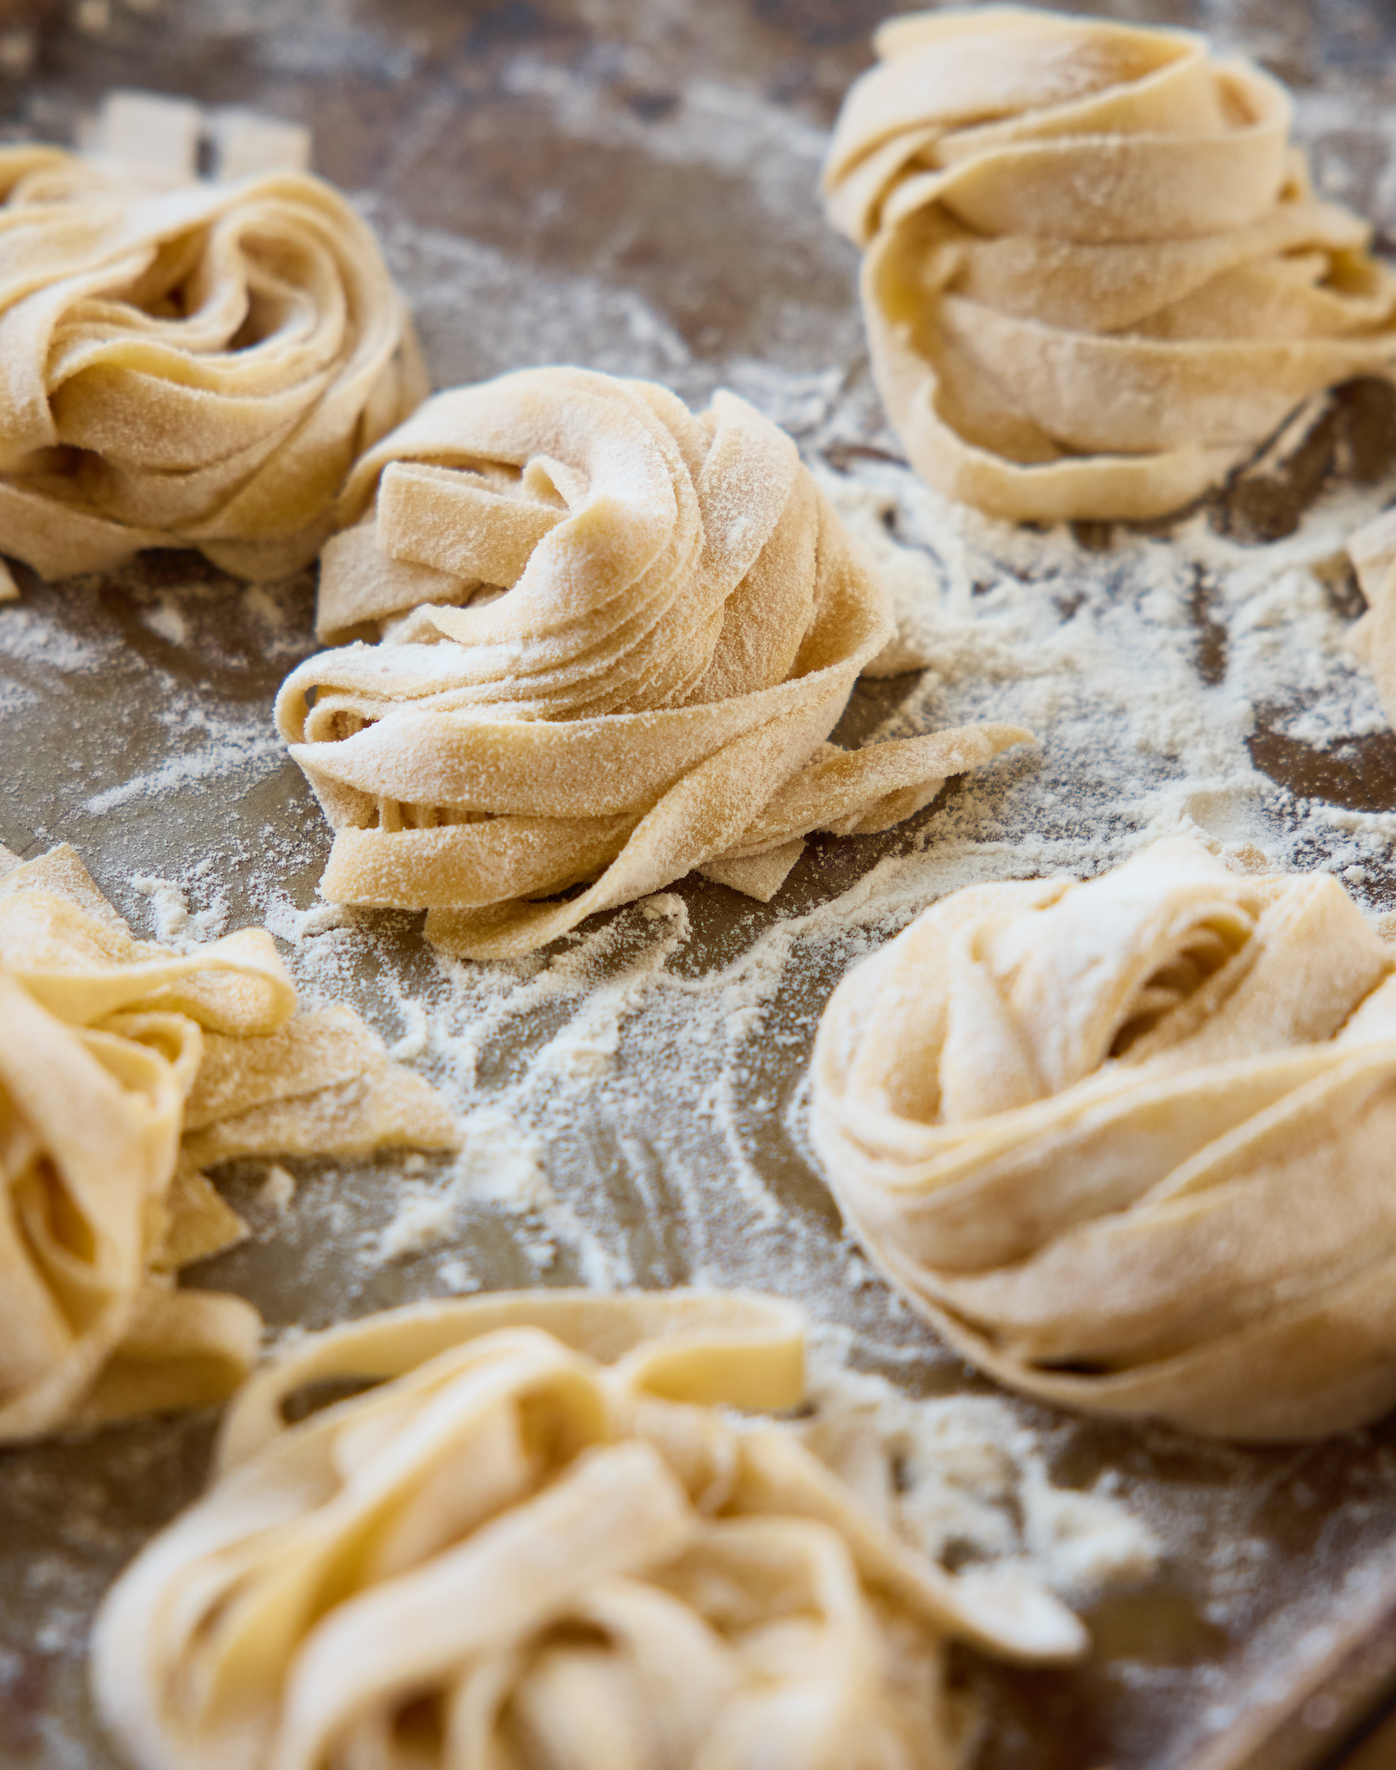
- Once your pasta is cut into the desired shape, spread them out (in a single layer) on a flour-dusted baking sheet before cooking so they don’t stick together.
- When I can I use Happy Egg Co. organic free-range or heritage-breed eggs that have deep-amber yolks with a rich, creamy flavor.


 Photos by Graydon Herriott
Ingredients
Basic Egg Dough
- 21⁄4 cups / 300g tipo 00 flour, plus more for dusting
- 3 large eggs, at room temperature 11⁄2 teaspoons extra-virgin olive oil I pinch kosher or fine sea salt Water, as needed
Large-Batch Egg Dough
- 3 cups / 400g tipo 00 flour, plus more for dusting
- 4 large eggs, at room temperature 2 teaspoons extra-virgin olive oil
- 1 pinch kosher or fine sea salt
Directions
- To bring the dough together using a machine: In a stand mixer fitted with the paddle attachment, on low speed, combine the flour, eggs, olive oil, and salt until crumbly. If using a food processor, pulse together the flour, eggs, olive oil, and salt until the dough starts coming together. Incrementally, add 1 teaspoon water at a time until the dough becomes a craggy ball and there are barely any dry crumbs of flour remaining. (Some days, it’s 3 teaspoons; other days, it’s a little more. Just don’t add too much water, since the flour will continue to hydrate as the dough is kneaded.)
- To bring the dough together by hand (to feel like a nonna): Place the flour in the center of a clean, dry, large, wooden work surface. Make a well with high walls, leaving some flour on the floor of the well. Add the eggs, olive oil, and salt to the well, then, using a fork and without bringing in any flour, gently beat the eggs and oil together until combined. Gradually start incorporating the flour from the inner walls into the egg mixture, whisking away any lumps as you work. Think of it as gradually making a smooth batter. When the dough starts to come together in a scraggly pile and the eggs aren’t runny anymore, use a bench scraper to fold the dough onto itself a few times, then use your hands to bring the dough into a mass. (You will most likely not need all the flour. However, if you did incorporate it all and the dough has become dry, add 1 teaspoon water at a time until you can bring it together into a ball.) Use the bench scraper to completely clean your work surface of any drying bits of dough. Wash and dry your hands before kneading.
- Lightly flour a work surface, place the dough on the surface, and knead (see page 000) until it becomes a smooth and supple oval ball and springs back when lightly pressed, about 10 minutes. Remove the crease line in the dough by pinching the crease together and pushing down on it with your palm.
- Cover the ball of dough with plastic wrap, or turn a mixing bowl upside down and place it over the dough on the work surface, and let it rest on the counter for 30 to 45 minutes. After resting, the dough may be sticky; if so, dust it with a little flour.
- If rolling pasta by machine: Divide the dough into four equal pieces. (If using a hand-cranked pasta roller, it is easier to work by dividing the dough into six pieces.) Work with one piece at a time, keeping the remaining dough well covered in plastic wrap. Flatten the piece of dough between your palms before feeding it through the pasta machine once on the widest setting (#1). Then, still on the widest setting and at low speed, feed the dough through the pasta roller, then laminate it by folding it in thirds, just as you would fold a letter to fit into an envelope. Repeat this step a handful of times, turning the dough 90 degrees between each pass. Keep your folds tidy in order to create an even rectangular sheet. Now, feed the sheet of dough through the rollers, turning the knob down incrementally to a narrower setting between each pass, until it’s rolled to the desired thickness. (There’s no need to fold between passes anymore.) If the dough feels sticky or puckers as it’s rolled, sprinkle it lightly with flour and use your hand to spread it gently across the sheet before feeding it through the machine again. This helps to keep the dough flat and smooth and prevents it from getting stuck.
- Once the pasta is cut or filled, place on a flour-dusted baking sheet. Lightly dust a little more flour on top of the pasta so they don’t stick. (It’s completely okay if the pasta dries out at this stage.) If cooking within a couple of hours, simply leave on the counter. You can place stuffed pasta, uncovered, in the refrigerator for a few hours but be very careful that they don’t become a sticky mess. To store stuffed or cut pasta, freeze in a single layer on a baking sheet, transfer the frozen pasta to a ziplock bag or airtight container, and freeze for about 1 month. For longer pasta, like fettucine, make small individual portioned nests before freezing.